この記事ではFlutterにてアニメーションを作成するための手順を解説します。
目次
アニメーションを作成する手順
Flutterにてアニメーションを作成する際は次のステップを辿ればOKです。
StatefulWidgetを作成State内にてAnimationControllerを初期化Stateに対してTickerProviderStateMixinを適用
AnimationControllerの挙動を確認するための最低限のコードは次の様になります。
/// `StatefulWidget`を作成します。
class AnimationExampleView extends StatefulWidget
{
@override
_AnimationExampleViewState createState() => _AnimationExampleViewState();
}
/// `State`に対して`TickerProviderStateMixin`を適用します。
class _AnimationExampleViewState extends State<AnimationExampleView> with TickerProviderStateMixin
{
AnimationController _animationController;
@override
void initState()
{
/// `initState()`内にて`AnimationController`を初期化します。
_animationController = AnimationController(
/// アニメーションを何秒掛けて行うかを設定します。
/// ここでは2000ms(=2秒間)かけてアニメーション処理を行うように設定しています。
duration: const Duration(milliseconds: 2000),
/// `vsync`には`this`を渡します。
vsync: this
);
/// 初期化した`AnimationController`を再生します。
/// `from`パラメーターはどの地点から再生するかを指定可能で、0.0 ~ 1.0 の間の値を指定します。
_animationController.forward(from: 0.0);
super.initState();
}
@override
void dispose()
{
/// `Widget`が`dispose()`されるタイミングで`AnimationController`の`dispose()`も必ずコールします。
/// コールし忘れるとオブジェクトが開放されず、メモリリーク等の原因となります。
_animationController.dispose();
super.dispose();
}
@override
Widget build(BuildContext context)
{
return Scaffold(
backgroundColor: Colors.white,
body: _buildAnimation(),
);
}
Widget _buildAnimation()
{
/// `AnimatedBuilder`はセットした`AnimationController`の状態が変化した際に
/// `builder`に渡した関数をその都度実行することで再描画を行ってくれます。
return AnimatedBuilder(
animation: _animationController,
builder: (BuildContext context, Widget child) {
return Column(
mainAxisAlignment: MainAxisAlignment.center,
children: <Widget>[
Row(
mainAxisAlignment: MainAxisAlignment.center,
children: <Widget>[
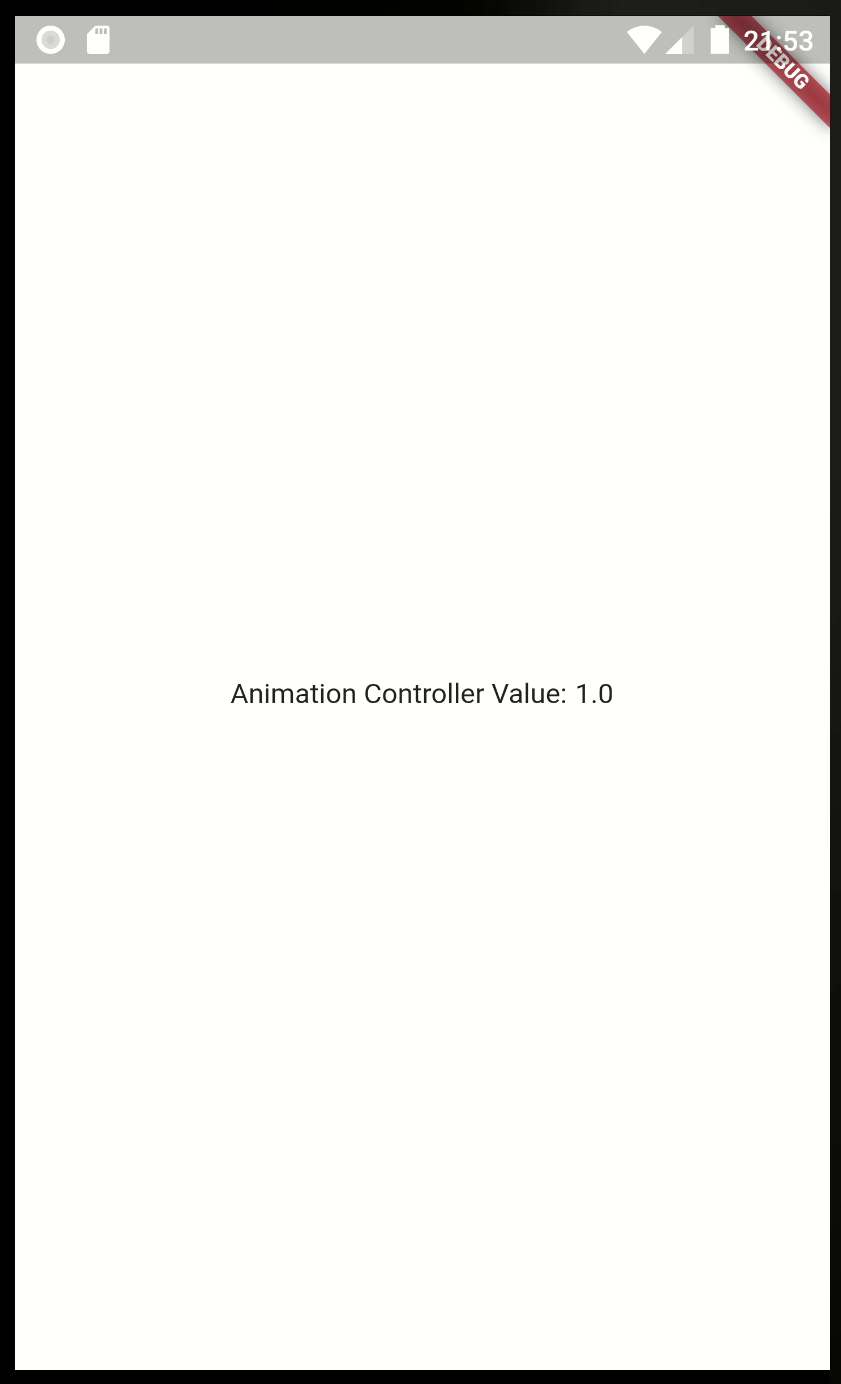
/// `AnimationController`の現在の値は`AnimationController.value`にて取得出来ます。
/// `AnimationController.value`の値は、0.0 ~ 1.0 の間で変動します。
/// 今回の場合は初期化時に設定した通り、2秒間かけて、0.0 ~ 1.0 まで直線的に値が増加します。
Text('Animation Controller Value: '),
Text('${_animationController.value}')
],
)
],
);
},
);
}
}
作成したAnimationExampleViewをmain.dartで呼び出してみると、数値が増加していくのが確認出来ます。
void main() {
  runApp(App());
}

class App extends StatelessWidget
{
  @override
  Widget build(BuildContext context) {
    return MaterialApp(
      title: 'Animation Example',
      home: AnimationExampleView(),
      theme: ThemeData(
        primarySwatch: Colors.blue,
        visualDensity: VisualDensity.adaptivePlatformDensity,
      ),
    );
  }
}
このようにFlutterではAnimationController.valueによって提供される値を上手く活用することで、アニメーションを作成していく形になります。
フェードアニメーション
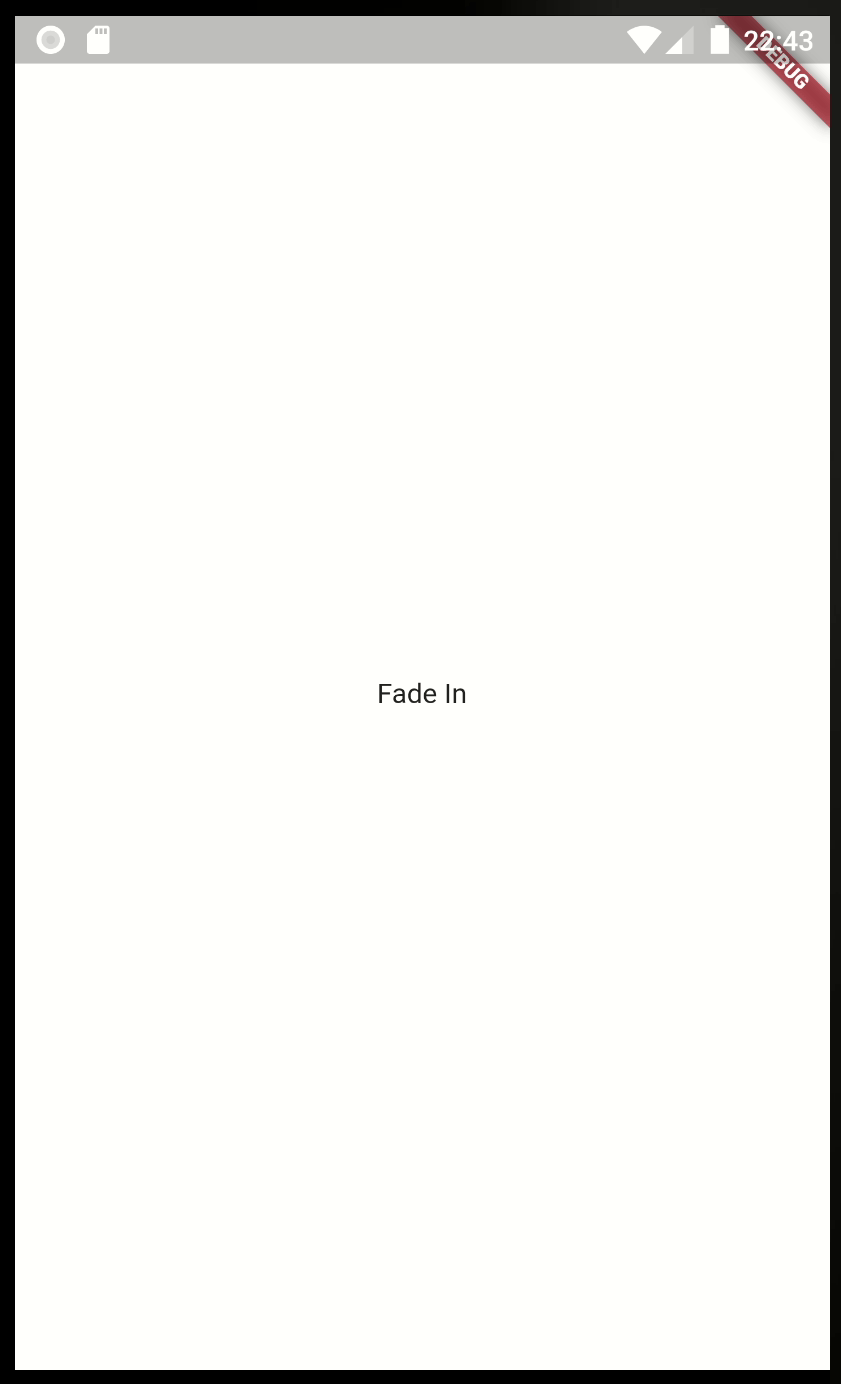
UIが徐々にフェードインしてくるアニメーションを作成してみます。
前項で作成した_AnimationExampleViewStateの_buildAnimation()を拡張します。
class _AnimationExampleViewState extends State<AnimationExampleView> with TickerProviderStateMixin
{

  ...

  Widget _buildAnimation()
  {
    /// `Tween`は`.animate()`にて渡す`AnimationController`のどの位置からどの位置までを再生するかを設定できます。
    /// begin: 0.0, end: 1.0 を指定した場合、アニメーションは最初から最後まで全て再生されます。
    /// begin: 0.5, end: 1.0 を指定した場合、アニメーションは50%の地点から最後までが再生されます。
    final animation = Tween<double>(begin: 0.0, end: 1.0)
      /// アニメーションのカーブを設定します。
      /// `CurvedAnimation`の`parent`には`AnimationController`を渡します。
      /// `curve`に描きたいカーブの形を指定します。ここでは`Curves.fastOutSlowIn`を指定します。
      /// 参考: https://api.flutter.dev/flutter/animation/Curves/fastOutSlowIn-constant.html
      .animate(CurvedAnimation(
        parent: _animationController,
        curve: Curves.fastOutSlowIn,
      ));

    return AnimatedBuilder(
      animation: _animationController,
      builder: (BuildContext context, Widget child) {
        return Column(
          mainAxisAlignment: MainAxisAlignment.center,
          children: <Widget>[
            Row(
              mainAxisAlignment: MainAxisAlignment.center,
              children: <Widget>[
                /// `FadeTransition`は子ウィジェットの透明度を設定出来るWidgetです。
                /// 作成した`animation`を`opacity`に渡します。
                FadeTransition(
                  opacity: animation,
                  child: Text('Fade In'),
                ),
              ],
            )
          ],
        );
      },
    );
  }

  ...

}
実行すると、設定したアニメーションカーブにて透明度が変化していきます。
トランスフォームアニメーション
更にUIが下から上へ移動するアニメーションを組み合わせてみます。
_buildAnimation()を更に拡張します。
class _AnimationExampleViewState extends State<AnimationExampleView> with TickerProviderStateMixin
{

...

  Widget _buildAnimation()
  {
    final animation = Tween<double>(begin: 0.0, end: 1.0)
      .animate(CurvedAnimation(
        parent: _animationController,
        curve: Curves.fastOutSlowIn,
      ));

    return AnimatedBuilder(
      animation: _animationController,
      builder: (BuildContext context, Widget child) {
        return Column(
          mainAxisAlignment: MainAxisAlignment.center,
          children: <Widget>[
            Row(
              mainAxisAlignment: MainAxisAlignment.center,
              children: <Widget>[
                FadeTransition(
                  opacity: animation,
                  /// `Transform`ウィジェットを利用します。
                  /// `Matrix4.translationValues()`を利用して、下から上へ移動するUIを表現します。
                  child: Transform(
                    transform: _generateMatrix(animation),
                    child: Text('Transform'),
                  ),
                ),
              ],
            )
          ],
        );
      },
    );
  }

  Matrix4 _generateMatrix(Animation animation)
  {
    final value = lerpDouble(30.0, 0, animation.value);
    return Matrix4.translationValues(0.0, value, 0.0);
  }

...

}
実行すると、テキストがフェードインしながら下から上へ移動するアニメーションが再生されます。

アニメーションに遅延を設定する
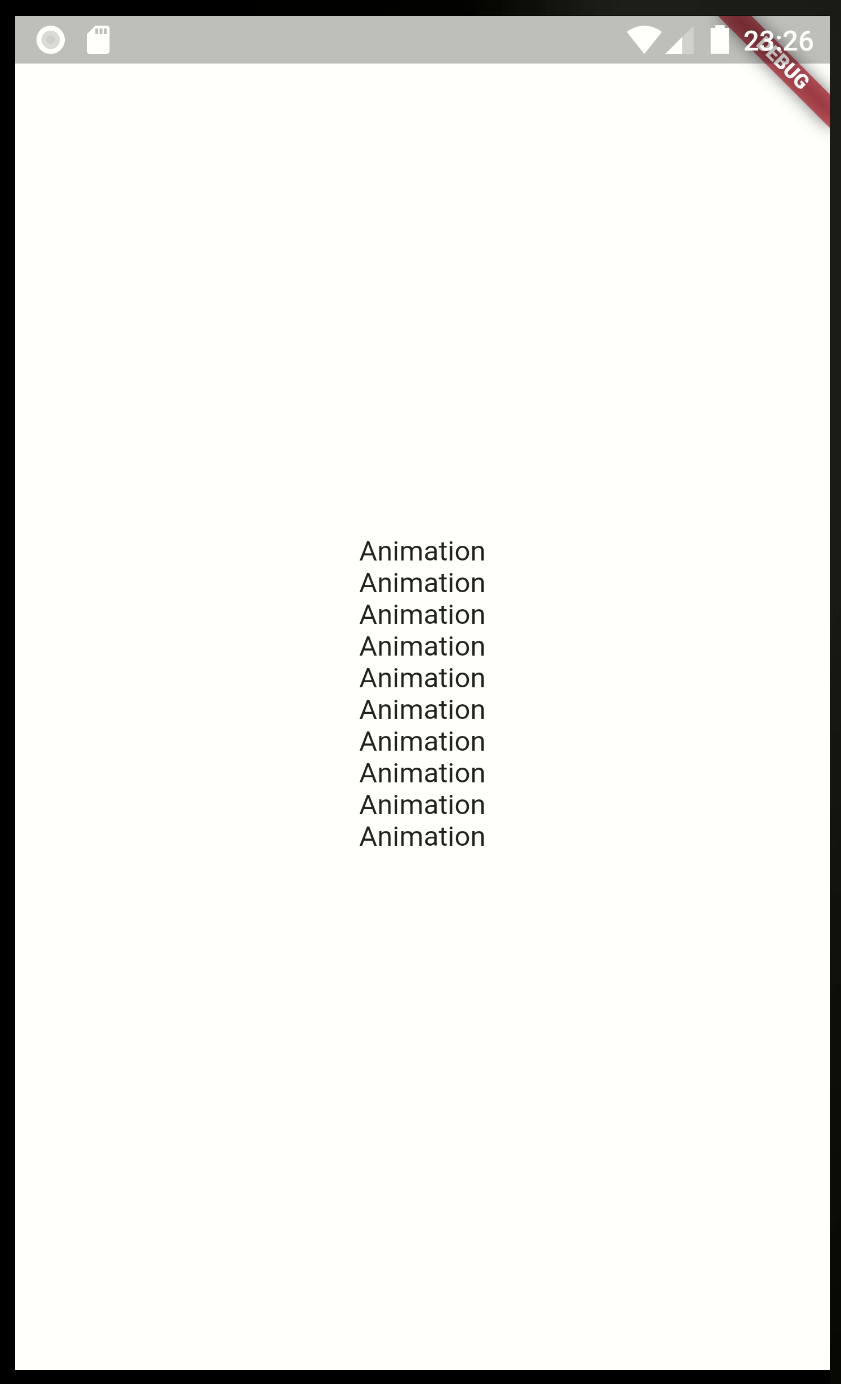
複数のUIを同時にアニメーションさせる際、全てのアニメーションを同時に再生するよりも各UIのアニメーションに少しずつ遅延(ディレイ)を設定すると、よりリッチなアニメーションを表現出来ます。
Animationを作成する際、curveへIntervalを指定することで、遅延を表現する事が出来ます。
final animation = Tween<double>(begin: 0.0, end: 1.0)
  .animate(CurvedAnimation(
    parent: _animationController,
    /// `Interval`は、アニメーションを遅延させるために使用します。
    /// 例えば、begin: 0.5, end: 1.0 に設定した6秒間のアニメーションは、
    /// 実質的に3秒後に始まる3秒のアニメーションになります。
    curve: Interval(0.0, 1.0, curve: Curves.fastOutSlowIn),
  ));
AnimationExampleViewを拡張します。
class _AnimationExampleViewState extends State<AnimationExampleView> with TickerProviderStateMixin
{

...

  Widget _buildAnimation()
  {
    return AnimatedBuilder(
      animation: _animationController,
      builder: (BuildContext context, Widget child) {
        return Column(
          mainAxisAlignment: MainAxisAlignment.center,
          children: <Widget>[
            _buildRow(_createAnimation(0)),
            _buildRow(_createAnimation(1)),
            _buildRow(_createAnimation(2)),
            _buildRow(_createAnimation(3)),
            _buildRow(_createAnimation(4)),
            _buildRow(_createAnimation(5)),
            _buildRow(_createAnimation(6)),
            _buildRow(_createAnimation(7)),
            _buildRow(_createAnimation(8)),
            _buildRow(_createAnimation(9)),
          ],
        );
      },
    );
  }

  Widget _buildRow(Animation animation)
  {
    return FadeTransition(
      opacity: animation,
      child: Transform(
        transform: _generateMatrix(animation),
        child: Row(
          mainAxisAlignment: MainAxisAlignment.center,
          children: <Widget>[
            Text('Animation'),
          ],
        ),
      ),
    );
  }

  Animation _createAnimation(int delay)
  {
    assert(delay < 10);

    final actualDelay = 0.1 * delay;

    return Tween<double>(begin: 0.0, end: 1.0).animate(CurvedAnimation(
      parent: _animationController,
      curve: Interval(actualDelay, 1.0, curve: Curves.fastOutSlowIn)
    ));
  }

  Matrix4 _generateMatrix(Animation animation)
  {
    final value = lerpDouble(30.0, 0, animation.value);
    return Matrix4.translationValues(0.0, value, 0.0);
  }

...

}
_buildRow()にて生成しているUIは、それぞれ少しずつ遅延したアニメーションが指定されているので、各行が僅かな遅延を以てレンダリングされます。
アニメーションを逆再生する
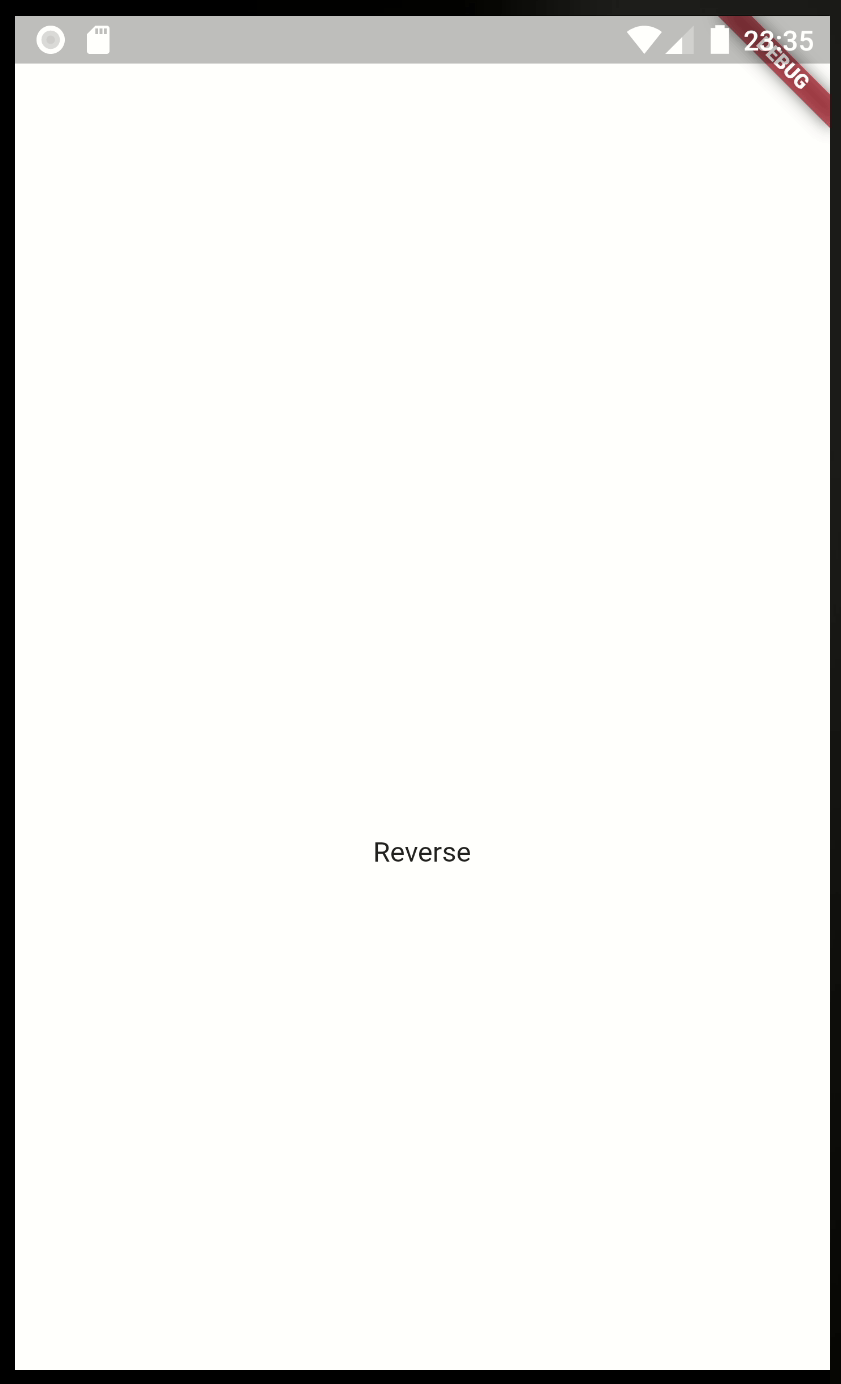
AnimationController.reverse()を呼ぶことで、再生されたアニメーションを逆再生することが出来ます。
Reverseをタップすると、AnimationController.reverse()が呼ばれるように_buildAnimation()を拡張してみます。
class _AnimationExampleViewState extends State<AnimationExampleView> with TickerProviderStateMixin
{

...

  Widget _buildAnimation()
  {
    return AnimatedBuilder(
      animation: _animationController,
      builder: (BuildContext context, Widget child) {
        return Column(
          mainAxisAlignment: MainAxisAlignment.center,
          children: <Widget>[
            _buildRow(_createAnimation(0)),
            _buildRow(_createAnimation(1)),
            _buildRow(_createAnimation(2)),
            _buildRow(_createAnimation(3)),
            _buildRow(_createAnimation(4)),
            _buildRow(_createAnimation(5)),
            _buildRow(_createAnimation(6)),
            _buildRow(_createAnimation(7)),
            _buildRow(_createAnimation(8)),
            _buildRow(_createAnimation(9)),

            GestureDetector(
              onTap: () {
                _animationController.reverse();
              },
              child: Text('Reverse'),
            ),

          ],
        );
      },
    );
  }

...

}
Reverseをタップすると逆再生が開始されます。
おわりに
Flutterのアニメーションは非常に直感的で、各種カーブも予め定義されているので複雑なアニメーションも比較的簡単に実装することが出来ます。
モバイルアプリは機能的な要件が必要十分実装されているかという点のみならず、如何にUIがイケているかという観点もLTVに響いてくるので、過剰過ぎず、小気味良いアニメーションを有効活用していきたい所です。